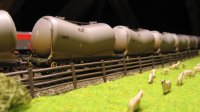
Bachmann are now producing a good range of coaches with built-in lighting. I thought it would be good fun to have these DCC controlled using the function buttons. Express Models also produce some great LED oil lamps for your coaches. These two combined in one coach was just too much for me to resist. Out comes a used (spare, having replaced 08419 with a Gold and Power1) Lenz Silver Decoder (overkill, I know), the tool kit and soldering iron, and here we go.
 I fitted the decoder inside the coach, the LED tail lamp on the rear, took the wiring from the internal lighting and connected it all together. The internal lighting was wired to function output A, and the tail lamp to function output C. Function output A was mapped to the F0 key, and function output C to the F1 key. A"flashing" lighting effect was added to function output C (Function outputs A and B share the same lighting effect, so the tail lamp had to be on C).
The end result was terrific. There's nothing like pressing a button on the controller and watching the tail lamp on your rake start flashing.
Maybe I should get out more?